
DES 100 - Scale
Rhino 3D modeling (Blue Team)
<Contents>
Exercise
Learning Rhino
1st Iteration
2nd Iteration
3rd Iteration
Final Model
Reflection
➰Exercise➰
Before going straight to the assignments, the professor gave us a brief activity. Trying to make some examples before making our own.
Used a cutting mat, glue, craft knife, and ruler.
Used a cutting mat, glue, craft knife, and ruler.

➰Learning Rhino➰
This was my first time using 3D modeling, Rhino.
First, it was hard to figure out how to use it.
The biggest problem was controlling the screen where I wanted to move and moving the direction of the shapes.
I have just tried to make and try lots of different shapes in it.
Depending on our assignment, I had to create a virtual object by intersecting 2 or 3-dimensional geometric primitives at a non-perpendicular angle.


➰My 3D Model➰
Before making the 3D shape from Rhino, I scribbled down a bit. My interest in design mainly concerns children, so I am trying to combine everything with children and design.
My design of this shape has lots of meanings in it. It shows my positionality.
My design of this shape has lots of meanings in it. It shows my positionality.
In detail, it represents the shape of children's toys. I want to be a designer who makes things that are helpful to children in the future. My shape resembles a character that can be anything you imagine, like a bear, witch, fish, etc.
Moreover, I wanted to add meaning to my shape, so I have also added a little about my family. My family member is seven, and I am the first of my five siblings. Like this, this shape is not just a shape of anything. I have related to my design goal and about myself.
Moreover, I wanted to add meaning to my shape, so I have also added a little about my family. My family member is seven, and I am the first of my five siblings. Like this, this shape is not just a shape of anything. I have related to my design goal and about myself.


🖌️1st Iteration🖌️
This is my 3D modeling shape-making from Rhino.
Using one pentagonal pyramid shape with two squares. I have tried many times.
At first, when I made the 300mm-scale box, it was too small, so I tried it in many different ways, and finally, it fit the shape of it. During this stage, I had to check all four angles.
As I did it by checking only one angle, the shape became strange, so I checked and fixed all four angles and strengthened my shape.


After making the exact shape, I had to make it 2D by entering 'Unrollsuf' at Rhino. Before that, I needed to make the shape as one model by entering 'Booleanunion' in Rhino.
During this stage, I learned several input keys used in Rhino.
These pictures are the blueprint for making my 3D model into 2D.


Then, my model changed to a 2D model, which became the blueprint of my shape. I have connected the pieces apart and made the tabs for each part of the model. This is the first attempt of my net.
I combined 4 sheets of A3 paper because if I divide it into too many pieces of the shape, I need to use lots of glue, which will create a lot of gaps, and the shape will be less neat.


This is the progress of making the actual 3D model using paper.
Mine had to combine 4 sheets of A3 paper, so it had to take up a lot of space. I was unfamiliar with using knives, so it was hard to cut and glue it at first attempt.

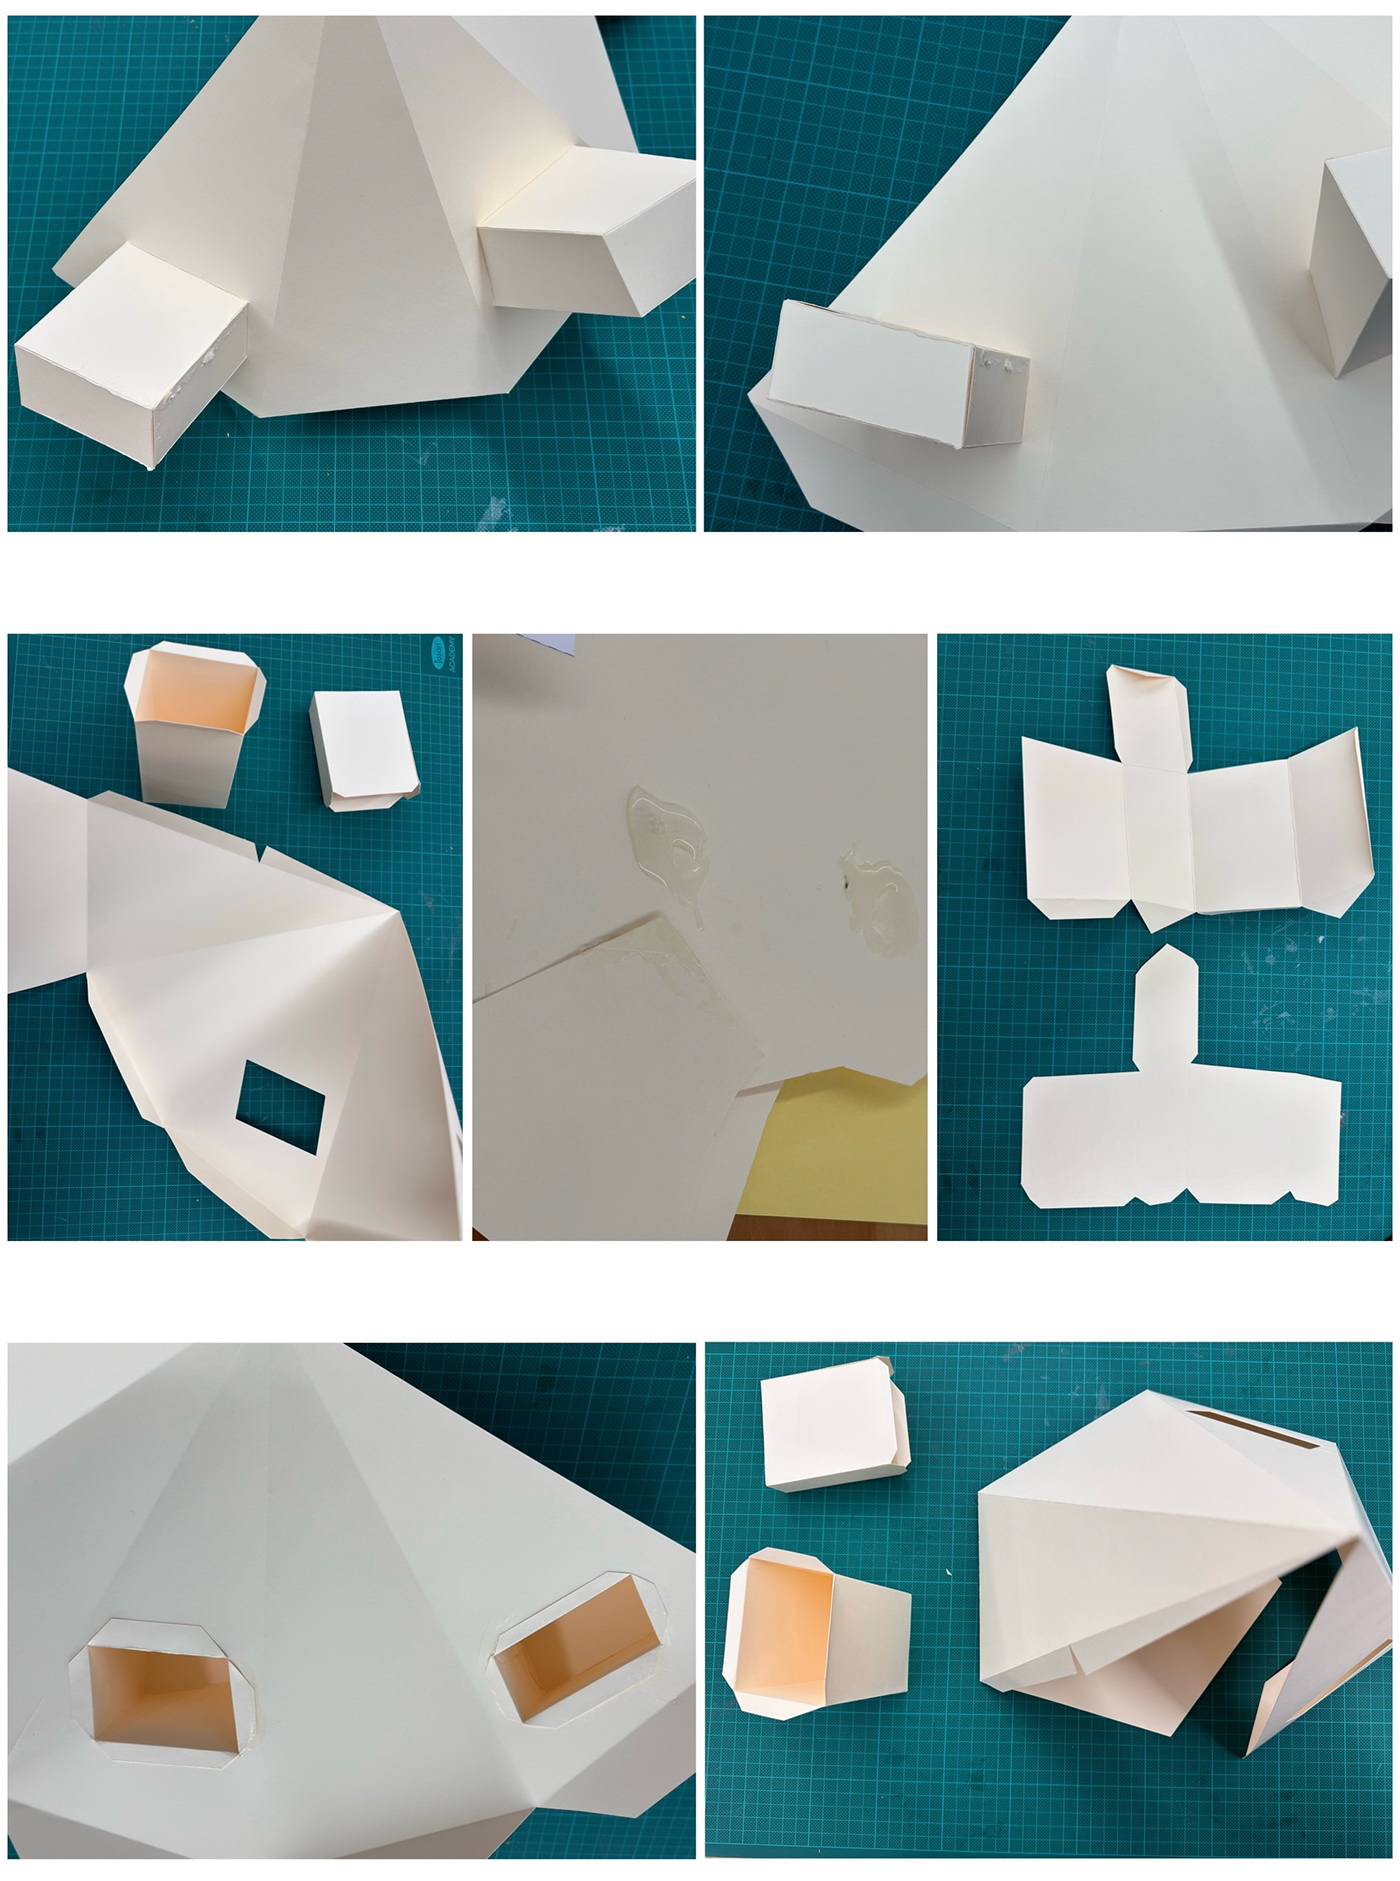
This is an accurate 3D model made using paper after completing the blueprint. The left side is the first picture I have ever finished, and you can see that the square does not fit.
I wondered why it did not fit, but I kept looking at it the next day and realized it did not fit because the squares on both sides were reversed. So I tried to glue it together but put it in the opposite direction and tried again, and it turned out to be in better condition than before.

The pictures show my first attempt at making my 3D model, having problems, such as many gaps and wrinkles. I made a lot of mistakes because this was my first attempt. I attached the largest body part and then pushed to stick the side squares. It made the body parts rip. I used a lot of glue on the outside to cover them up. And it made the model look really messy.


First Attempt
- I put the squares in the opposite direction, it did not go in.
- I put the squares in the opposite direction, it did not go in.
- The large model was completed without putting both squares in, and attaching both sides of the squares after making the big part made me use lots of glue in the outside part of the model.
- The tab size was too big that it touched the opposite side, and it was hard to fold the lines where they were supposed to be folded.
- The tab size was too big that it touched the opposite side, and it was hard to fold the lines where they were supposed to be folded.
(What to improve)
- Reduce the tab size and avoid contact with the folding line on the other side.
- Before completing the body part, attach the squares on both sides first.
- Do not glue the outside as much as possible.
🖌️🖌️2nd Iteration🖌️🖌️
After my first attempt, I changed a few things in the model for the parts I failed to do. I sketched in Procreate before switching from Rhino.
I changed the model blueprint to a form where all the small pieces merge simultaneously to remove the gaps between the pieces.
Then, I changed the model from Rhino based on
what I sketched in Procreate.
Left: Jointing every piece of the model at once / Right: Adding tabs to the model


This is the process of my second attempt at printing the model and then making it. I wanted to make the whole body part at once, but the practicing paper was smaller than the frame of my shape, so I needed to cut one side of a small piece.

I put the side squares in first and then made the body part.

This is the shape of the 3D model of my second attempt. It is better than my first attempt. You can see that it is noticeably better than my first attempt. Since the body is completed by attaching two squares before finishing the body, it can be seen that the part where the square touches the body has become neat.
However, looking closely, I have found another problem. The problem was about the top part. Since all the corners of the top had to be glued together, many cracks happened.


Second Attempt
- Changed blueprint.
- Changed blueprint.
(Reduced tab size)
- It was better than the first attempt.
- It was better than the first attempt.
(Put two squares into the body before the body part is complete)
- The overall shape is clean, but the top part of the model is cracked.
- The overall shape is clean, but the top part of the model is cracked.
(What to improve)
- Change the blueprint to make the top part clean and neat.
- Change the way to use glue (Using a small paper sheet)
🖌️🖌️🖌️3rd Iteration🖌️🖌️🖌️
After the second attempt, which was more advanced than the first, I made the third attempt. Following the professor's advice,
"Why don't you connect the corners that are difficult to glue together rather than connecting the base of the triangle?"
I re-sketch the design using Procreate.

After Sketching, I changed the net at the Rhino.

This is the progress of my third attempt.
My third attempt was improved than the two prior attempts.
However, I have made a mistake that has never happened from the previous attempts. I thought the square would fit the body part even if I rolled it up and folded it at any time, but it was not. I made a square with the cut line in reverse that did not fit the body part.
I tried to cut it with a knife and flip it upside down, but it did not work, so I printed out a new square design and made it again. But I made the same mistake again. Still, this time, I gently removed the glue, flipped it, and put it on the body part. I was fortunate to experience this failure before the final.

In advance, I changed the method of using glue.
I squeezed the glue on a piece of paper, scooped the glue out of another piece of paper, and painted the glue on my model.
This helped to bury only the right amount of grass and kept the glue from leaking out of the model.
This is the shape of the 3D model of my third attempt.
It is better than my previous attempts. I made the same mistake twice in flipping the squares on the sides while making it, so the glue part was ripped open, flipped, and re-attached, leaving paper scraps, which made the surface not completely clean. Nevertheless, the overall shape has become very neat.

The top part, a problem in the second attempt,
was also neatly completed according to the changed net in Rhino.

Third Attempt
- Changed blueprint.
- Changed blueprint.
(Changed the attaching part of each small piece)
- A problem appeared with flipping the square, and it did not fit.
- A problem appeared with flipping the square, and it did not fit.
(Paper scraps appeared)
- It was better than the previous attempts.
(Resolved the top cracking problem)
- It was better than the previous attempts.
(Resolved the top cracking problem)
(What to improve)
- Not to make the mistake of making the side square parts.
🖌️🖌️🖌️🖌️Final🖌️🖌️🖌️🖌️
I completed my final after three attempts.
I had difficulty making the final model using the final paper
because it felt different from the practice paper.
The paper was a little thicker, so making a cut line took a lot of work.
When I applied glue to the paper, it absorbed the liquid, so it wrinkled and sizzled.
<Shape>

<Craft>

<Scale>

<More pictures of My Final>

➰Reflection➰
This was my first time using Rhino and making a paper model.
This was a new challenge for me, and in the end, it gave me lots of new skills and lessons related to design.
At the beginning of this project, I tried to make complex shapes using doughnut shapes and circle ones at Rhino. Still, the teacher said that making complicated shapes is unimportant, so I started this task by pledging to myself, 'Let's make a model that I made simple but perfect instead of trying to make a difficult shape.' However, the difficulty came from getting acquainted with Rhino. As I continued to make shapes many times, I got used to it and learned several input keys for Rhino.
I had a problem printing out the shapes I had made with my idea. I was trying to print them out, but only the money was gone from the card, which was not printed. In addition, I had put four sheets for my 3D Model together to make four A3s, but they all came out on one piece of A3 paper and came out very small. I had a lot of difficulties using printing like this. After many attempts, I could finally print out the blueprint of my first attempt.
My first attempt at this was a mess, so as I was making this, I wondered if I could create a perfect Model in this given time frame. So, during this project, I worked in the design studio almost every day from Monday to Saturday.
There were a couple of difficulties: cutting and gluing.
I have mainly used scissors on daily bases because knives felt dangerous and scary. Through this project, I recognized that knives are useful and that they are one of the essential tools for designers. And I used to use tape more than glue. However, I had to use glue for this project, so I tried using it in many different ways. I learned how to use glue well and completed the Model neatly.
I have mainly used scissors on daily bases because knives felt dangerous and scary. Through this project, I recognized that knives are useful and that they are one of the essential tools for designers. And I used to use tape more than glue. However, I had to use glue for this project, so I tried using it in many different ways. I learned how to use glue well and completed the Model neatly.
Furthermore, the difficulty was attaching the last tab after completing the Model. When bonding other parts, I could attach one side to the other by putting my hand inward, but the last part was difficult because I could not press it by putting my hand into the Model. However, I tried this part several times and completed it neatly.
As the saying goes, "The time and effort invested will not betray," I finally completed my neat Model. I was so proud and new because this experience was my first time on no basis, and I have experienced improvement in myself.
It was a short but long period for me. However, this assignment had many positive effects on me. Here is the list of what I have learned during this project.
<Lesson parts>
- It takes several attempts to complete something. I realized that every time iteration was done, there was something that needed to be improved.
- Unintended mistakes can occur when I think I have done it perfectly.
- To do an excellent job of distributing the time. (It takes a lot of time to create a single finished work of something)
- Whenever I improvise a process, I need to record it at that moment.
<Skill parts>
- How to use Rhino (input keys)
- How to create a blueprint
- Correct use of knives, rulers, glue, etc. and various uses
- How to do documentation
Of course, my final Model is not perfect.
I have made a little bit of a mistake in attaching the side square parts. Also, I tore the end part of the paper while sticking the last part of the body part. Nonetheless, I have learned lots of things during this project, and I am more confident about using Rhino and shaping 3D Models than at the beginning of this project. Furthermore, I would like to try more complicated shapes next time, like what I tried to do first (circle, doughnut shape, etc.)


